Lucille

Ok, so after a few weeks waiting for the DVLA for the paper work back, I finally get my v5 and confirmation of my new reg πŸ™‚ correctly registered with pilgrim sumo as the car, emissions noted on front (there have been a few issues this year with the changes) and now my new number plates πŸ™‚

No MOT for 3 years because its registered in 2018 but I have an age related plate the donor car/engine πŸ™‚

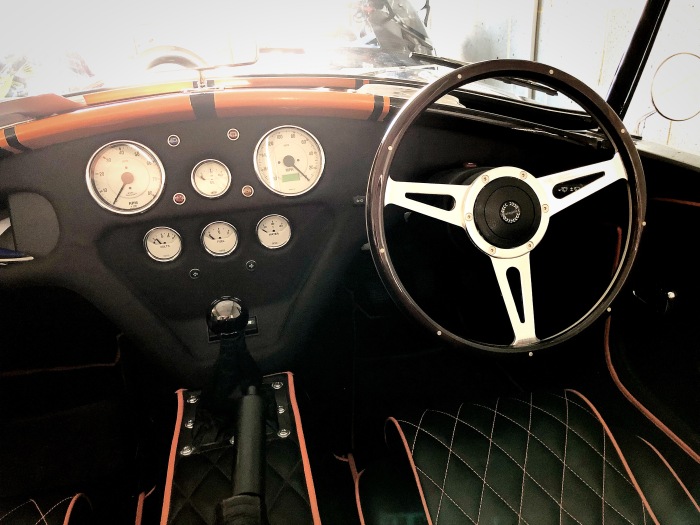
What does the future hold for Lucille, I’m not sure yet, its taken under two years to finished (with a year off in the middle) there were parts I loved and parts I hated, times I thought I would never get this done, it was too much of an ask. But I can finally say I’ve built a road worthy car which looks and sounds awesome. So what’s the net challenge???

Until I decide here’s my final album of Lucille in all her glory. If you thinking of building or are in the middle, you can do this, I did, I know its tough, its also more expensive than you first set out! Help is always on hand on the various forums (Cobra Club) and at Pilgrim but you have to speak to the right person … But all in all, I’m glad I stuck it out and got her finished and you will too.

I hope you’ve enjoyed my blog and my journey building an AC Cobra Replica from Pilgrim Motorsports.

Cockpit

Slowly but surely the cobra is starting to come to life, or at least for me in the way I want her to look. I ordered a set of sun visors and wind-wings from Europa Spares last week and thought it was about time I put them together and on the car.

To make things clear I went for smoke coloured sun visors, I thought that would match the black more and for the wind-wings I decided on perspex rather than glass. Two reason really, one was because I’d read some awful stories of them shattering over people from stone chips and secondly they came with the fitting kit and were less than half the price! Big saving for me at the moment.

To be fair now I have them and they are on, they look and do the job just as well, so its a thumbs up from me.

So any problems with the kit, not really, the hinges come in various bits and on first glance I think OMG now what, no instructions, this is going to be fun! But actually once you start getting them out, they make perfect sense where everything goes together nicely. The only real issue is they don’t come with any fitting screws/bolts to attach to the screen. Most likely because different manufactures use different screen, maybe for different size bolts etc.

The Sumo standard screen uses 4 M4x16mm (countersunk) bolts for the wind-wings, 2 each side. The sun visors use 4 M3x8mm bolts (countersunk), however I used M3x10mm rounded head ones, which went in very slow and easy until they tightened around the fixing. Phew no broken windscreen! Everything nice and tight and fits well and now looks even better. I’m not going to worry about the hood yet, it might be a winter project but for now, its a summer, open top car!

You’ll see form the interior shot I also decided on the handbrake handle, which was a chrome mini handle from eBay. Really easy to fit, the old just pulled off and the new one was fitted via a small grub screw. The gaiter I ended up glueing in place because of how baggy it was, not the best fit but does the job I guess.

The only thing left is the spats and number plates … just waiting on the dvla now to send my V5 back with my new reg. Oh on that, remember you also need to pay a registration fee Β£55 because of the new chassis … I forgot! but thankfully the lady I spoke to sorted it with 6 months tax, the registration fee and a refund of the difference. Saves time and I’m really hoping I get that paper work over the next, or days would be extra nice πŸ™‚

Thats it for now, not quite legal on the road but not far to go now!

Steering Wheel

Finally decided on what type of steering wheel I wanted and size … I ended up going for a wheel from Vintage Warehouse 65 on eBay. The original wheel, that being from a ford sierra was 15″ rubber, old and really didn’t suit the car. The one I have chosen to install is a 14″ wheel dark wood and metal 3 spoke wheel, much better in my opinion.

The boss that came with and horn push wasn’t quite as straight forward as I thought. The boss its self I had to cut down because the part that fitted to the existing column was too long, so the horn attachment didn’t meet the wheel. I took of approximately 5mm off in the end to get a better fit. The other issue I had, was in getting the horn to work. In the usual Pilgrim set up there are two wires coming from the steering wheel to the horn, but the new boss only had one wire. The sierra wheel itself has a two ringed fixing to complete the circuit for the horn and the new boss had a single solid ring for the horn. It was all very different and no mater how I tried I couldn’t get the horn to sound or stop going off, not without re-wiring the column.

Instead I ended up taking off the double conducting ring from the sierra wheel and glueing this onto the new boss. This way I kept the same two wire set up and didn’t have to rewire any of the electrics behind the wheel. On the push button horn itself I just added a lever and metal contact so that when the horn is pushed it competes the circuit and the horn sounds, basically same set up as before.

Photo 15-07-2018, 18 54 58

Finished wheel and new black shinny gear knob, couple more additions to the Cob πŸ™‚

All I have left now are the wind wings, sunvisors (all ordered from Europa Spares) and the spats (which will be added in time) oh and the gear lever, I still have to figure out what I’m doing on that.

Just waiting on the DVLA now to issue my number plate.

Bling!

So what do you do once you’ve passed the IVA, bling the car a little by adding a little chrome here and there.

Here’s a run down of what I’ve done done far … One major change was to the front nose, which I’ll go into detail a little further on. I’ve added a couple of ‘AC’ badges to the nose and boot and a cobra snake badge on the sides. I’ve replaced the rubber washer jet with a nice chrome one and added some chrome to the side vents. The mirrors have been replaced with a set of round period chrome mirrors, as well asΒ the rear view mirror, thats now mounted above the dash area.

The nose … I really liked the single bar across the nose area instead of a grill, but you need a grill to protect the rad from stone chips etc. I decided that I would remove the pilgrim supplied grill and replace it with a more open grill from B&Q set this back within the nose area and install a single chrome bar at the front.


This was fairly straight forwarding I managed to mould the mesh inside the nose area and connect it to the nudge bar rods and connect it to the bottom of the opening by bending it around and securing it with the same bolts I used on the old mesh. The bar itself is just a chrome rail bar from B&Q with a long threaded bolt through the middle and secured in by using some left over rubber hose, cut and squashed in, it was very very tight so i’m not worried about any movement there. Looks a lot better I think.


Quick view of the AC badge on the front and rear. I had to drill some small holes for these and then used some glue to make sure it wouldn’t come off! You can see the little sticker I had made up for ‘Lucille’ on the rear right hand side. Begging for a number plate now.


The chrome side pipe shields came with the exhausts when I brought them over a year ago, I’ve been waiting a while to get these bad boys on. Hopefully they’ll help prevent any burnt legs getting in and out the car when its hot! All these little bits of chrome just help it all come together.

So whats left … I’ve still got the steering wheel to change, chrome handbrake handle and maybe a chrome gearnob. Chrome rear wheel arch protectors and then there’s the sun visors and side wind deflectors to add. Still a bit to do, but I don’t currently have any of those items so I’ll have to save up the pennies and get those, hopefully before the DVLA get my number plate back to me.

Plenty to do and dress up while I wait, before I can go for a proper drive πŸ™‚

What will I don when she’s finished …. oh yer … Drive!